Mastering Graphic Design for T-Shirt Apparel and Full-Color Workspaces
There is a specific kind of magic that happens when a concept moves from a digital sketch to the fabric of a garment. For designers, entrepreneurs, and content creators, the bridge between these two worlds is built on technical precision and creative intuition. We often talk about the aesthetic of a shirt, but rarely do we discuss the environment required to create it. If you want your designs to pop, whether you are sending them to a screenprinter or a direct-to-garment (DTG) facility, you have to master the workspace. It starts with understanding that Graphic Design for T-Shirt Apparel is not just about drawing; it is about engineering a visual product that survives the transition from pixels to ink.
The reality is that your monitor lies to you. Unless you are working in a calibrated, full-color workspace set to the correct specifications, you are guessing. And guessing leads to muddy prints, disappointed customers, and wasted inventory. To build a brand that stands for quality, you need to treat your digital canvas with the same rigor as a photographer treats a darkroom. This means ditching the default settings and adopting a workflow that respects the medium. We are talking about high-fidelity color, robust resolution, and a deep understanding of how ink interacts with cotton and polyester blends.
The 300 DPI Standard: Why Resolution is Non-Negotiable
Let’s get technical for a moment, because this is where most hobbyists and even some seasoned designers stumble. You have probably heard the term "300 DPI" thrown around in design forums. DPI stands for Dots Per Inch, and it measures the density of pixels in a printed image. While 72 DPI is the standard for web design—where screens display images at lower densities—it is the death knell for print. When you send a low-resolution file to a printer, they have to stretch those pixels to cover the physical surface area of the shirt. The result? Blurry edges, jagged lines, and that unprofessional "pixelated" look that screams amateur.
For Graphic Design for T-Shirt Apparel, 300 DPI is the golden rule. It ensures that every curve, serif, and gradient is crisp. But resolution isn't just about the number; it's about the canvas size. You should always design at the actual print size or larger. If you are creating a chest print that is 12 inches wide, your document setup must be 12 inches wide at 300 DPI. This creates a massive file, yes, but it gives you the data density required for high-quality output. Whether you are using a premium font for a vintage band tee or a handwritten font for a boutique brand, high resolution ensures the ink sits cleanly on the fabric, preserving the texture and style of your typography.
Furthermore, this high-resolution environment is essential for both digital printing and screenprinting, though they handle data differently. Screenprinting requires "vector" style sharpness where possible, or extremely high-res rasters, because the ink is pushed through a mesh screen. Digital printing (DTG) acts more like an inkjet printer, spraying ink directly onto the shirt. Both methods, however, suffer terribly from low-resolution source files. By locking your workspace to 300 DPI, you future-proof your design assets for any production method.
Color Fidelity: The Full-Color Workspace Advantage
Color is emotion. In the context of branding and apparel, color is the primary driver of recognition. However, the RGB (Red, Green, Blue) color space you see on your laptop screen is vastly different from the CMYK (Cyan, Magenta, Yellow, Key/Black) world of printing. Screens emit light; ink absorbs it. A neon green that glows on your monitor might turn into a dull olive once it hits a black cotton t-shirt.
To combat this, you must work in a full-color workspace that allows for gamut checking. This doesn't mean you have to design exclusively in CMYK—many DTG printers prefer RGB files for their wider color range—but you must visualize how those colors will translate. A robust Graphic Design for T-Shirt Apparel workflow involves soft-proofing. This is a technique where you simulate the print output on your screen to see where colors will fall out of range.
Consider the impact on your brand identity. If your logo relies on a specific shade of electric blue, and that blue prints as a muddy purple, your brand consistency is shattered. This is particularly true for full color workspaces where gradients and photorealistic imagery are involved. When designing complex illustrations or using a modern typography style that relies on subtle shading, you need to know exactly how the ink will blend. By mastering your color settings and understanding the limitations of fabric printing, you ensure that the visual personality of your design remains intact from the screen to the street.
Typography in Apparel: Choosing the Right Typeface
When it comes to apparel, typography isn't just text; it's an illustration. The choice of typeface dictates the "voice" of the garment before the wearer even speaks. Selecting the right creative font is a strategic decision that influences readability, hierarchy, and audience engagement.
A display font or a serif font with high contrast might look incredible on a poster, but on a t-shirt that moves and wrinkles, it can become illegible. For apparel, you often want typefaces with generous x-heights and open apertures. A bold sans serif font is often the workhorse of streetwear because it punches through visual noise and reads well from a distance. Conversely, a script font can add a touch of elegance or retro flair to a boutique line, but it requires careful kerning to ensure the letters don't bleed into one another during the printing process.
Think about the hierarchy of information. Usually, a t-shirt has a "headline"—the main graphic or text—and supporting details. Your typography needs to establish this order instantly. If you are using a commercial font, check the licensing. Most standard licenses cover physical end-products like shirts, but it is always best to verify. You want a font pairing that offers versatility. Perhaps a heavy, condensed display font for the main impact, paired with a clean, legible secondary font for smaller details like dates or locations. This versatility ensures that your apparel looks professional, whether it's a limited run for a local event or a mass-market drop.
Practical Workflow: From Screen to Print
How do we put this all together? It starts with your workspace setup. Open your design software—be it Photoshop, Illustrator, or a specialized app like Procreate—and set your resolution to 300 DPI immediately. If you are working in raster (pixels), ensure your canvas size matches the intended print dimensions. If you are working in vector, you have infinite scalability, but you should still set up your artboard to the correct physical size to manage composition effectively.
Next, isolate your design elements. Graphic Design for T-Shirt Apparel often requires "knocking out" the background. You aren't printing on white paper; you are printing on a colored fabric. This means you need to master transparency. If you are using a handwritten font or a textured serif font, ensure the edges are clean so the shirt color doesn't peek through in a jagged, unappealing way (unless that is the intended distressed effect).
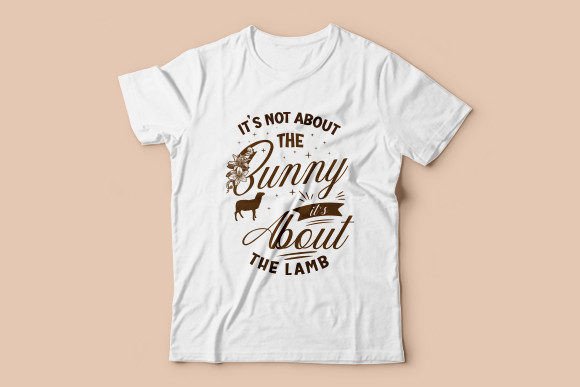
Test your font pairing and layout on a mockup. There are countless mockup generators available that place your design on a 3D model of a shirt. This step is crucial for editorial design and social media graphics. Before you spend money on printing, see how the design drapes over the contours of the body. Does the text warp awkwardly over a pocket? Does the bottom line of the logo disappear into the hem? These practical considerations separate the amateur from the professional.
Finally, communicate with your printer. Whether you are doing packaging design for a boxed set or simple web design assets for a merchandise store, the printer is your partner. Send them high-resolution PNGs with transparency or vector PDFs. Tell them what premium font you used so they can troubleshoot if rendering issues occur. By treating Graphic Design for T-Shirt Apparel as a serious discipline rather than a casual hobby, you build a reputation for quality. You create products that people actually want to wear, turning your digital canvas into a walking billboard for your brand.